前言
可以先到我這篇文章 Github Actions 做簡單的 Lint & Build CI 了解一下前置作業
假設看到這篇的各位已經對 Hexo 如何利用 Github page 架站有一定了解,可以直接切入正題
我的 Hexo blog source 跟 Hexo deployed source 是放在不同 repo 底下
- Private Repo : Hexo blog source files
- Public Repo : Hexo deployed web source
所以我會先做 git push 將新增的內容先更新到我的 blog source,再做 hexo d 讓 hexo 幫你 deploy build 好的靜態網站到指定的 Github repo & branch
接觸了 Github Action 後,發現 Deploy 這步可以交給 Private Repo 的 Action 去幫我處理!
只要做 git push,就讓 Github 自動跑 CD 做 hexo d
設置 SSH KEY
在你的 terminal 跑 ssh-keygen 來產生一組 ssh key,為了之後在 Github 上能設置權限而用
1 | ssh-keygen -t rsa -b 4096 -C "your_email@example.com" |
這時候會看到以下訊息要求你輸入 passphrase,為了方便自動部署,請直接 Enter 跳過,如果有設置的話每次使用這把 key 都會要求輸入密碼,就會造成 Github Action 在做 ssh git connection 時一直失敗
1 | > Enter a file in which to save the key (/Users/you/.ssh/id_ed25519): enter a file name wit the dir path |
會產生兩個檔案,一個是公鑰 (.pub),一個是私鑰
公鑰
公鑰的部分請放在你存放 Hexo Deploy sources 的 public repo 中
Settings -> Deploy keys -> Add new
複製貼上公鑰的內容到 Key 的欄位
Title 就取自己好管理的即可 HEXO_DEPLOY_PUBLIC_KEY 之類的

私鑰
私鑰就是存在 Hexo blog source 的 Private repo 要來使用並執行 Action 的憑證
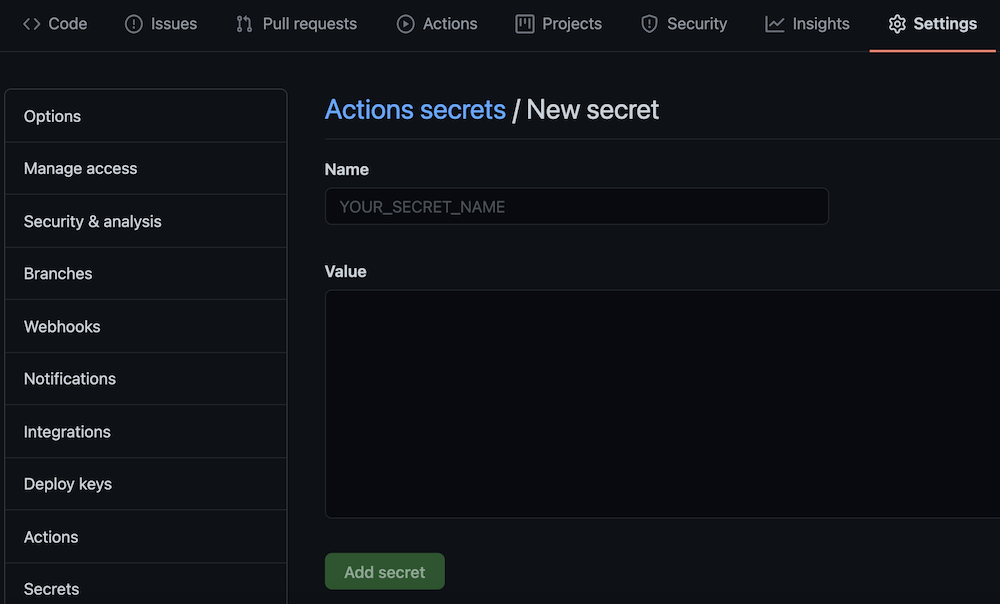
Settings -> Secrets -> New repo secret
複製貼上私鑰的內容到 Value 的欄位
Name 的命名之後會在 Action yml file 用到,取一個比較直觀的,例如 HEXO_DEPLOY_PRIVATE_KEY

Action file
在你的 Hexo blog source 的 Private repo 下建立 .github/workflows 資料夾
新增一個 hexo-deploy.yml 檔案
把 ssh private key 加入到 id_rsa 檔案中,設好 git config
1 | name: Publish Hexo |
Hexo Config
最後要記得去 _config.yml 中修改 deploy 的設定
1 | deploy: |
repo 的部分改成是 ssh connection 的形式
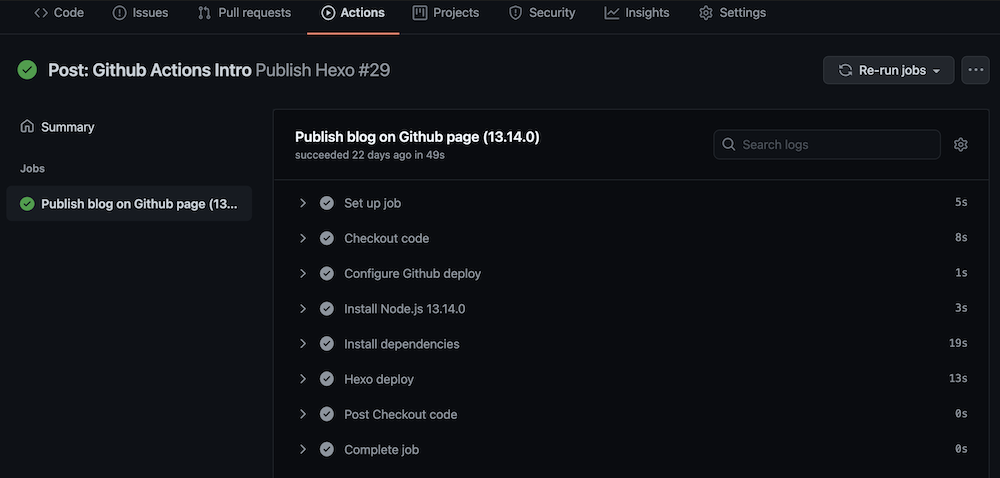
接著把新增的 workflow push 到 repo 內就能在 Actions 中看到運行的結果了

往後每一次更新文章,只需要 git push 到 blog source files,Github Actions 就會自動做 Hexo deploy 了!
後記
Github Actions 真的相當方便,自動化的其中一個目的就是解決微不足道但是需要一直重複的小事,Hexo auto deploy 應該是一個很好的例子跟練習,希望有幫助到人囉 😇